
Coffee Bag Design Ideas: Labels, Pouches, and Product Information
Compare central-label, origin-band, and type-first coffee bag designs. Organize fixed branding, product variants, and variable data alongside the pouch brief.
Practical coffee bag design ideas separate a stable brand identity from the information that changes between coffees and batches. A central label, an origin band, and a typography-led layout offer three distinct ways to organize the range. Choose the information hierarchy alongside the real pouch specification; an attractive concept does not validate its barrier, valve, closure, seal, or food labeling.
A clear coffee range should let a customer recognize the brand and distinguish the product. Plan where each piece of information belongs before filling every available surface.
Define the information hierarchy on a coffee bag
Start with the actual coffee products you sell and list the information you can substantiate for each. Distinguish the brand, product or variant identity, useful product details, and data that changes with a batch or roast.
Decide what the customer should find first
A readable brand name and product identifier can anchor the front. Additional information can be grouped nearby or placed in a planned area on the back. Keep the text hierarchy clear rather than giving every line the same size and weight.
| Information group | Role | What to confirm |
|---|---|---|
| Brand identity | Connect the range | Approved name, mark, and artwork placement |
| Product or variant | Distinguish the actual coffee | Accurate product identifier and confirmed claims |
| Product details | Help the customer understand the purchase | Correct wording for that product |
| Variable data | Record changing information where applicable | Approved fields, update method, and responsible person |
| Labeling review | Check required information for the intended market | Complete wording and layout reviewed before printing |
This table organizes artwork decisions. It is not a checklist of legally sufficient coffee labeling and does not supply approved origin, certification, or product claims.
Compare three original design systems
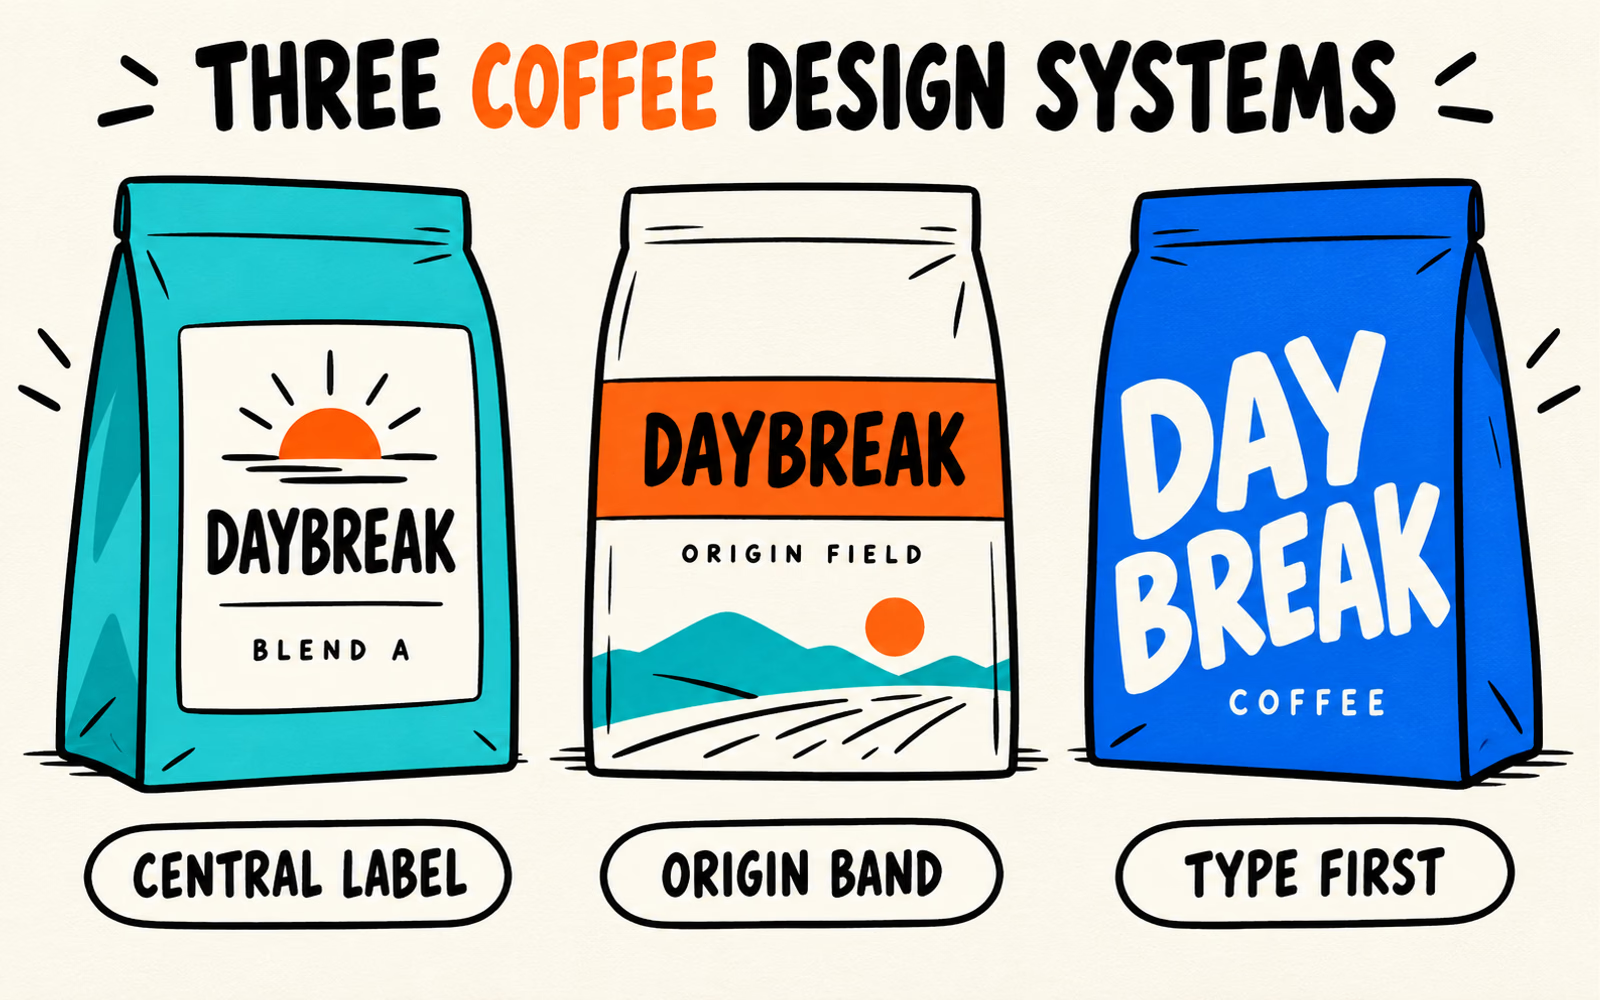
Imagine a fictional brand called Daybreak using one proposed pouch silhouette. The illustrations explore graphic systems only; the bag material and functional features remain to be specified.
System one: a central label
Give the front a defined label area with the brand and variant arranged together. This can keep the pouch surface visually simple while the information sits in a consistent zone. Confirm label dimensions, application surface, placement, and how it behaves on the proposed filled pouch.
System two: an origin band
Use a horizontal band to organize an accurately identified product or origin field. Keep the brand position stable and retain readable text identifiers across variants. Color helps organize the concept but should not be the only way to distinguish the coffees.
System three: type first
Let a bold brand name establish the first view, then create smaller zones for variant and product details. Check those zones against folds and the final filled shape. A large headline works only if it leaves enough room for the information that must also be readable.
Compare these systems on the same proposed pouch and product information. Record which fields move or change; do not attribute a functional advantage to a graphic style.
Plan variants and changing roast information
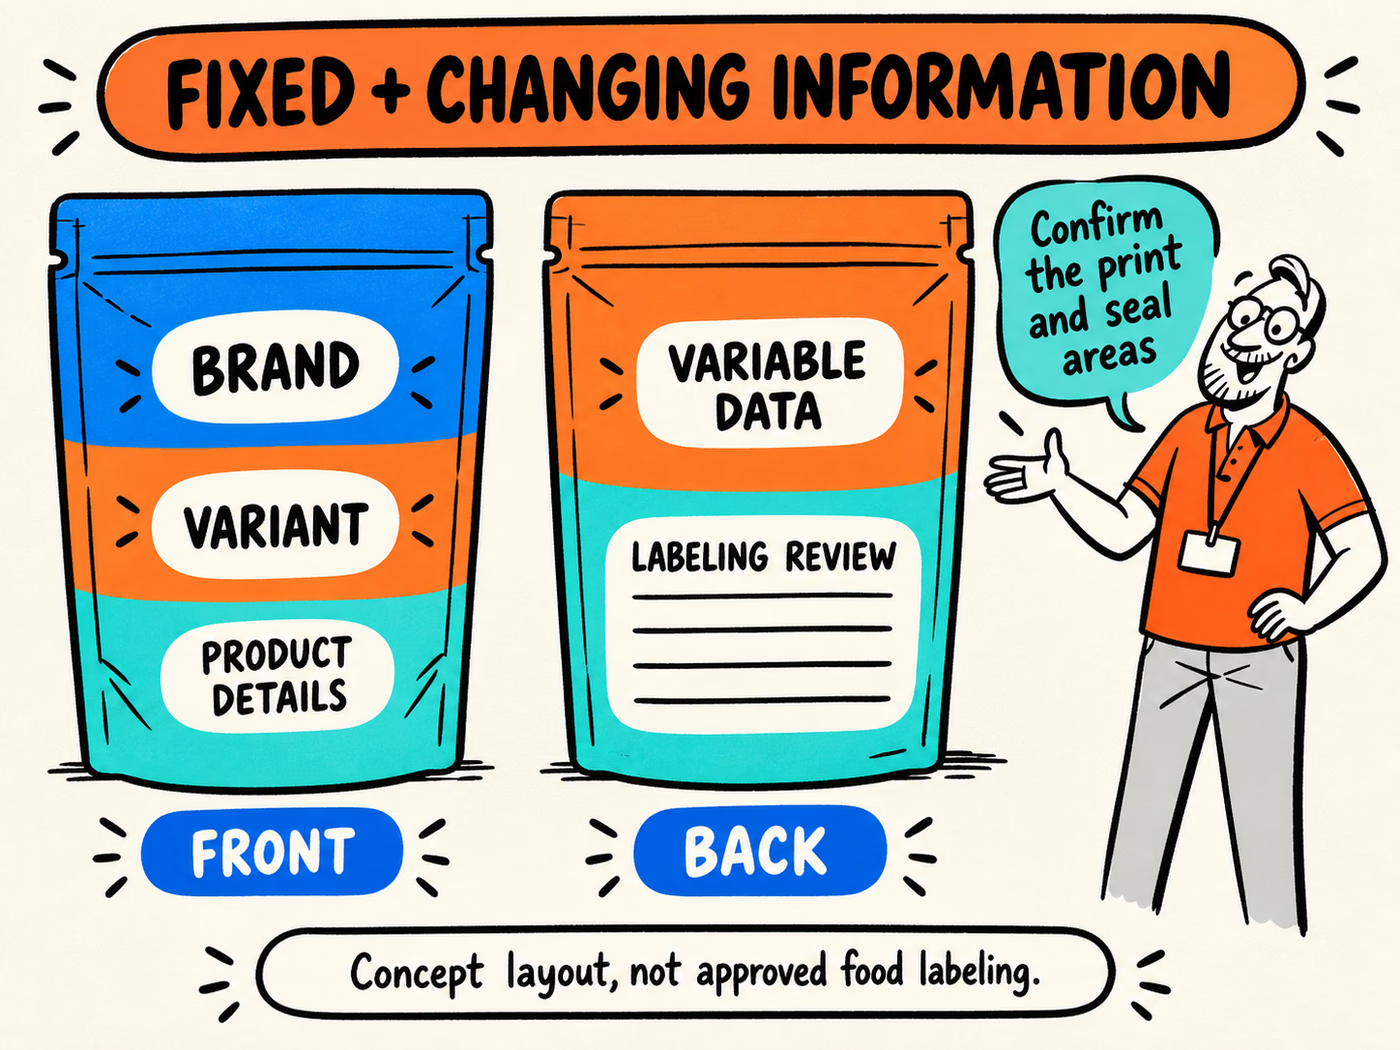
Create a small artwork map showing fixed branding, variant-specific information, and changing data. Then identify whether each field is printed as part of the packaging run, added by a separate label, or handled through another confirmed process.
Keep each version traceable
Give every design a clear version name and record the quantity assigned to it. Check that the pouch, label, and coffee match during packing. If product information changes, review all affected components instead of updating one file and leaving another with old wording.
Keep an approval record for any origin, certification, or other claim. Do not add a decorative seal simply because it fits the design. Leave unconfirmed wording out of the printed version until it is reviewed.
Leave a workable area for variable data
Confirm the proposed update method and usable print or label area with the supplier. Check that the changing information remains legible on the filled pouch and does not interfere with required closures or sealing areas. The valve, closure, and gusset guide helps organize the physical questions.
Prepare the pouch and artwork brief together
Describe the actual coffee and fill arrangement, intended use, and any required pouch features. Confirm dimensions using the proposed filled product, then identify the closure, sealing, and valve questions that need a reference-specific answer.
Send both sides of the brief
- Actual product, fill, and filled-product dimensions.
- Proposed pouch construction and required functional features.
- Confirmed closure and sealing requirements.
- Graphic system, print or label areas, and reviewed wording.
- Fixed, variant, and variable-data responsibilities.
- Quantities by design, delivery ZIP, and approval needs.
Use the coffee pouch specification guide for the physical request and the artwork guide for file preparation. Evaluate coffee bags and labels for the confirmed project rather than assuming the illustration represents an available construction.
A recognizable range.
Clear product information.
Planning packaging for your coffee? Share your filled-product dimensions, closure needs, quantities by design, and delivery ZIP. Packaging specifications are confirmed with your quote.
Planning references
- BrandYourPack: How to Specify Coffee Bags & Pouches.
- Coffee Bag Valves, Closures and Gussets.
- Packaging Artwork Guide.
Reviewed October 6, 2026. Three original design systems. Illustrations are not evidence of material performance, approved food labeling, or a manufactured brand project.