
How to Measure a Mailer Box
Measure the complete packed arrangement with its support and presentation components. Label internal fit, external size, units, and orientation separately.
The right size shipping box starts with the complete packed product, including its retail pack, support, cushioning, accessories, and card. Record the internal space needed with units and orientation, then confirm the supplier’s measurement convention. Request outside dimensions separately for the finished parcel. The bare item, internal fit, external envelope, and flat dieline are different measurements.
A box that fits the product on its own may leave no room for the parts that finish the order. Make the packing arrangement first; let that arrangement guide the size request.
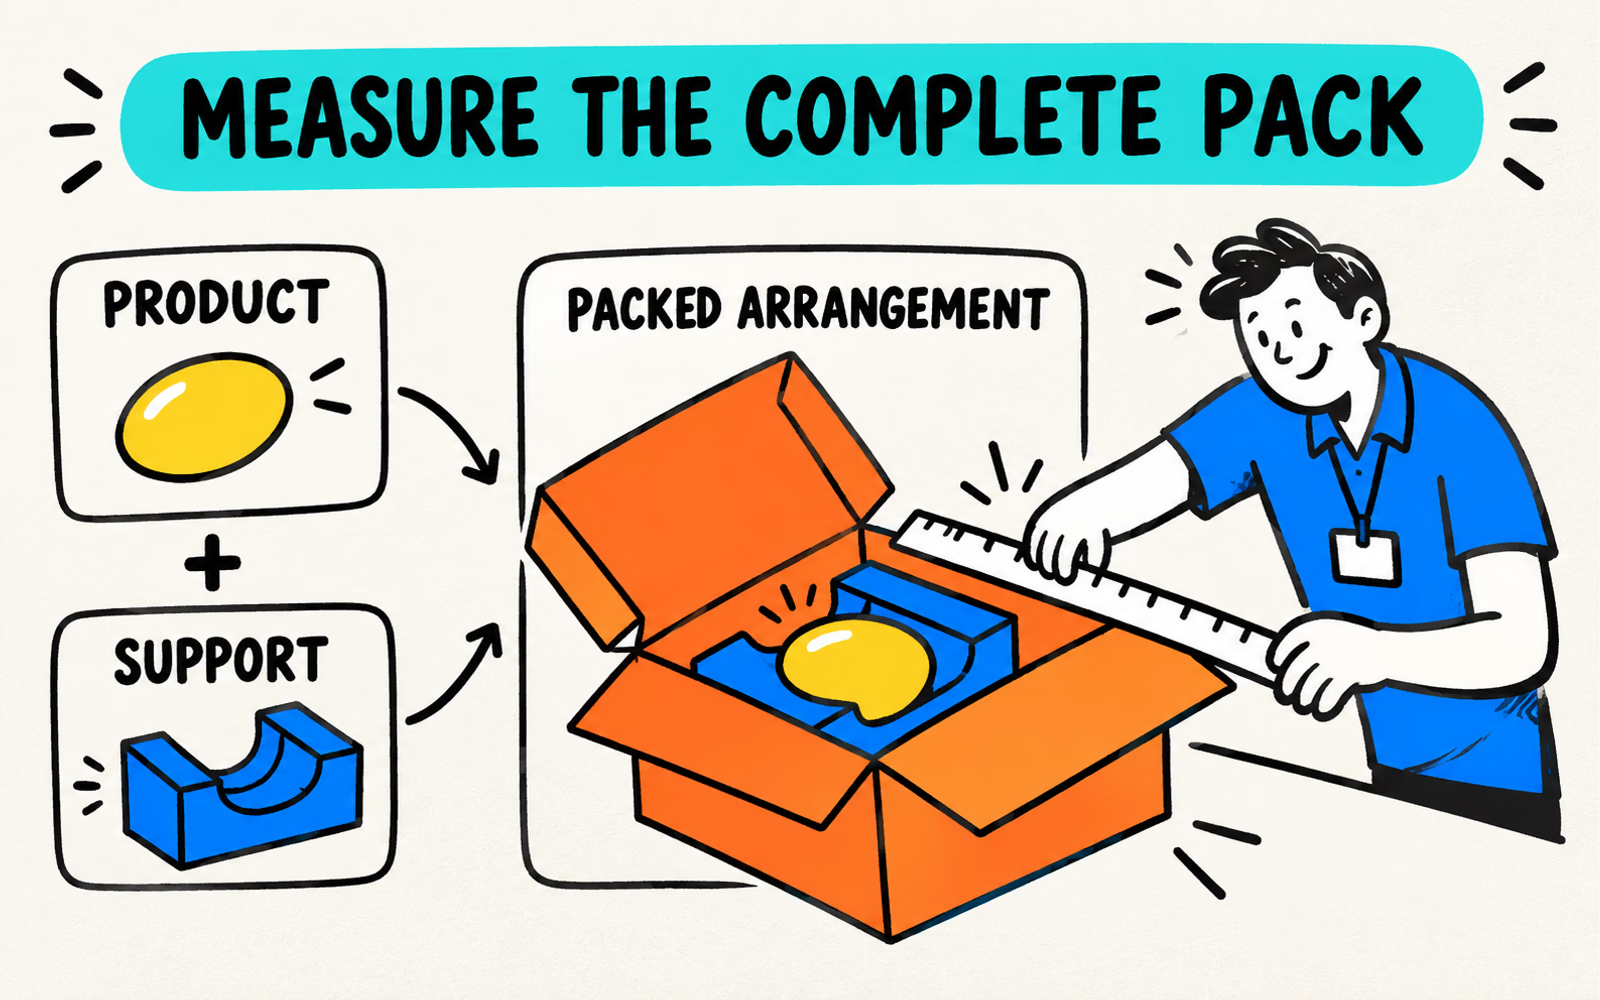
Measure the product with its required protection
Arrange the order as it will be packed. Include primary packaging, the proposed insert or cushioning, accessories, message cards, and presentation layers. Photograph the arrangement from useful angles and identify every component.
Measure the arrangement you will actually use
Record its length, width, and depth in a clearly labeled orientation. Keep the units on the same sketch as the values. If the pack changes by product version, measure the relevant combinations rather than relying on the bare item or a single convenient example.
For subscriptions, the changing-contents matrix helps compare the largest and smallest editions. An arrangement that accommodates one edition can still leave another poorly held. Review the full subscription brief with those variations.
For clothing, use the apparel format comparison before choosing a box. For a candle, include its actual primary container and proposed support; see candle packaging ideas. A generic support in our illustration does not establish protective performance.
Record internal fit separately from outside dimensions
Internal dimensions describe usable packing space. External dimensions describe the completed package envelope. A flat dieline describes panels, folds, and joining areas before assembly. Label each explicitly.
| Record | What it answers | Confirmation needed |
|---|---|---|
| Internal fit | Will the complete arrangement fit? | Usable space, orientation, support, and construction allowances |
| External size | What space does the closed parcel occupy? | Actual assembled construction and measurement convention |
| Flat dieline | Where will artwork print, fold, and join? | Approved layout, version, units, and non-printing areas |
A terminology example, not a recommended size
If an insert needs 10 × 8 × 4 inches of usable space, label those as the requested internal dimensions. They do not establish outside dimensions or the allowance required to fit that insert. These illustrative numbers are not a measured sample or a guaranteed size.
Do not subtract a fixed amount from an outside measurement or add a universal board thickness to predict the parcel. Ask how the proposed reference is measured and obtain its drawing or assembled sample. Keep nominal values distinct from actual measurements.
The FEFCO design code supplies established box-style terminology; it does not replace the dimensions and specification for your project.
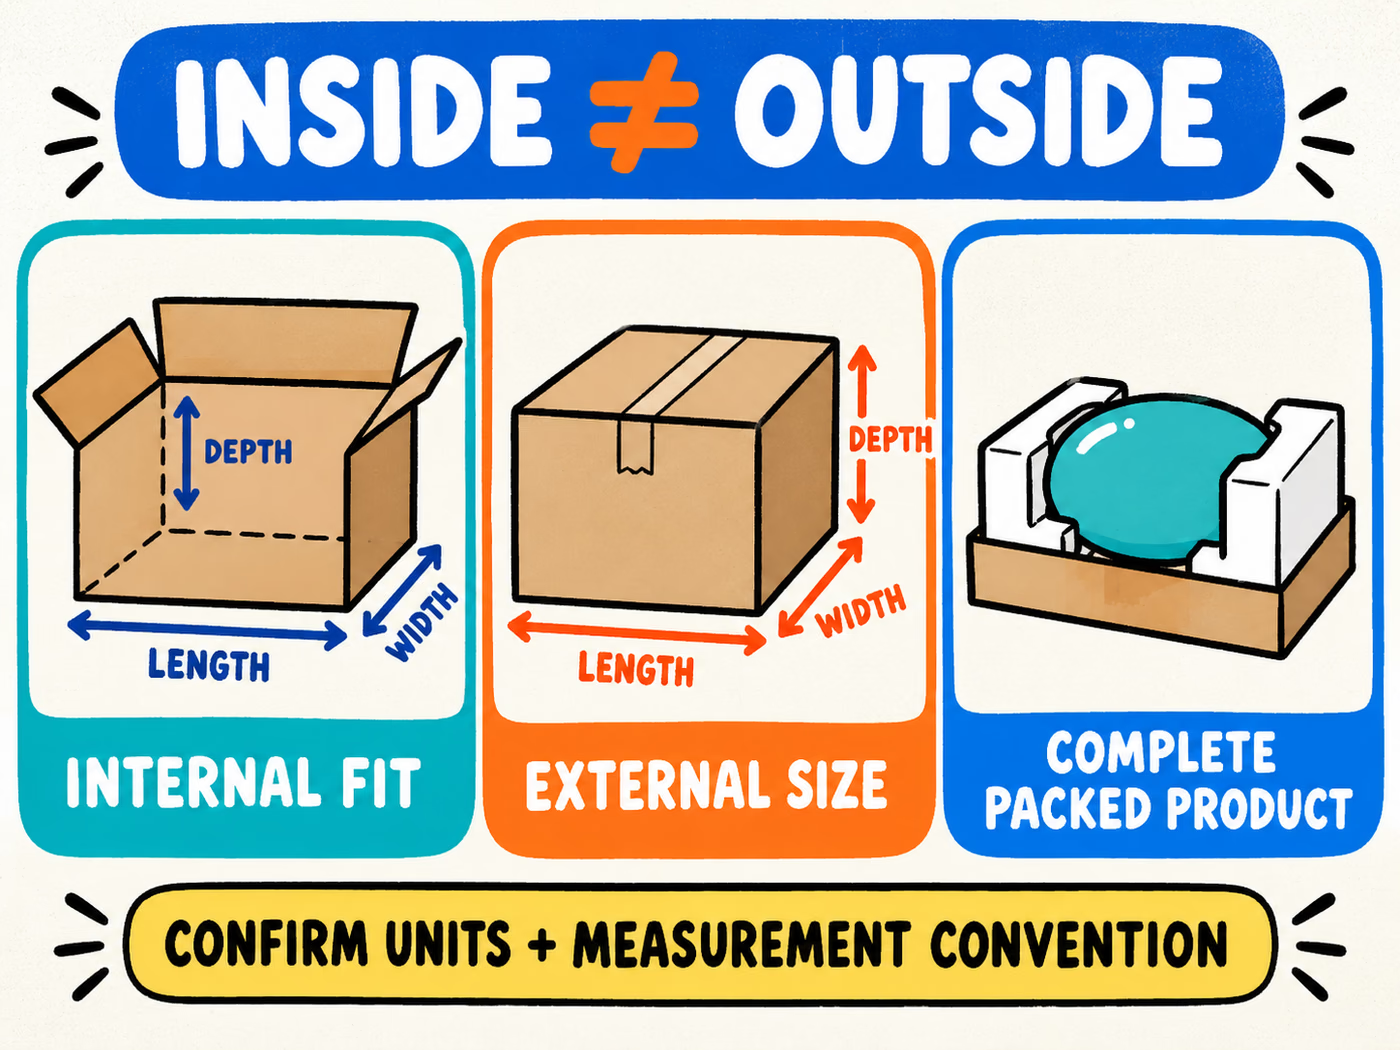
Check closure, movement, and complete packed weight
Place the full arrangement in the proposed sample and follow its assembly instructions. Check whether supports seat correctly, the lid closes as intended, and the customer can remove the item. Record interference or unwanted movement for review with the supplier.
Closure clearance is part of the actual construction. Avoid forcing a lid onto a fragile item or treating a decorative layer as cushioning. Keep the closing method and holding components in the same record as the dimensions.
Include the finished parcel
Record complete packed weight, including the box and all components, for the intended distribution route. Review board construction and format roles separately; a size alone does not establish a suitable construction.
Use the sample checklist to document the actual arrangement and review procedure. A successful fit observation is not a published transport-test result. If the contents, support, or box changes, revisit the fit and handling questions.
Send a clearly labeled measurement brief
Send the photographs or sketch with units, dimension order, orientation, and the words internal, external, or nominal beside every value. Identify the proposed product and support references, complete packed weight, and route. Our quote requests can use inches; keep the chosen unit explicit.
- List all contents and presentation components.
- Separate the largest and smallest order arrangements.
- Identify usable internal-space requirements and remaining fit questions.
- Request confirmed outside dimensions for the assembled pack.
- Keep the reference drawing and sample record with the approved version.
Review mailer boxes, shipping boxes, and product boxes according to their intended role. Finish the quote checklist before preparing production artwork with the approved layout.
A 3D preview can communicate the idea but is not a production drawing. Carryout is a separate format: use the bag-size and handle guide for that arrangement. Keep the final dimension convention in the approval record so the next order uses the same meaning.